Plant Schedule Table Setup
To have Plant Scheduler generate a plant schedule as a table in your drawing file, you need to start with a template (placeholder) table that Plant Scheduler will populate with the plants. Typically you would add this table to the template that you use when creating new planting plans. That way you can configure the styles and layout of the table once and have it available in the future.
For more information on working with tables, refer to the AutoCAD documentation. Here's a quick walkthrough on creating a new table to use with Plant Scheduler.
Create a Table
Plant Scheduler will work with tables defined in Model space or on any layout in Paper Space. You can place the plant schedule table wherever is appropriate for your needs. For example, you may have a "Plant Schedule" layout that contains the plant list.
To add a new table for the plant schedule, go to the Annotate tab of the AutoCAD ribbon and click Table in the Tables section. This will open the Insert Table window.
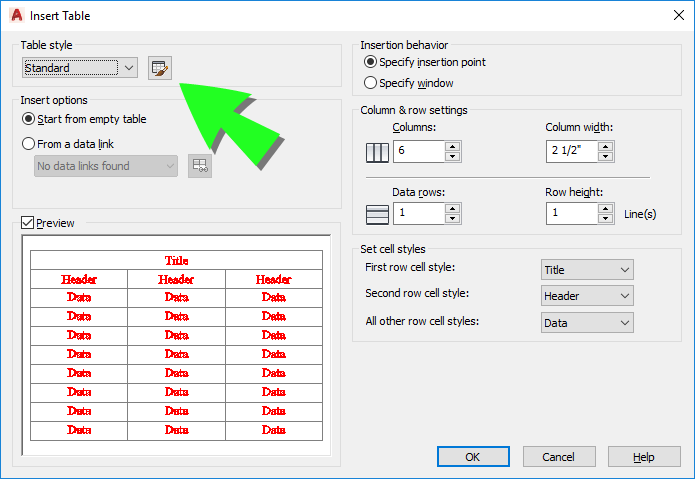
In this window, set the number of columns to the number of columns you will use for your plant schedule. Plant Scheduler will add new columns if necessary, but it's easier to get your template layout right if you set this now.
The rest of the default options shown are appropriate: you will insert a table with a Title, a Header row, and one placeholder data row.
You may want to create a new Table Style to use with your plant schedule tables. See the next section for more information.
Once you have finished configuring the table, click OK to insert it. Then add a Title in the title row of the table. You will probably need to adjust the column widths to suit your preference, and also set the page break options for the table.
You can add column headings if you wish, or you can have Plant Scheduler generate them later.
You don't need to add any data to the table in AutoCAD; Plant Scheduler will fill in the rest of the information.
Table Styles
Table styles are used to apply uniform formatting (fonts, borders, text alignment, etc.) to tables of the same type. For example, you can create a "Plant Schedule" Table Style and to use with plant schedules.
To create a new table style
- click the Table Style button in the Table style section of the window (see green arrow above).
- In the Table Style window, click New.
- In the Create a New Table Style window, give your style a name ("Plant Schedule" would be the obvious choice) and click Continue.
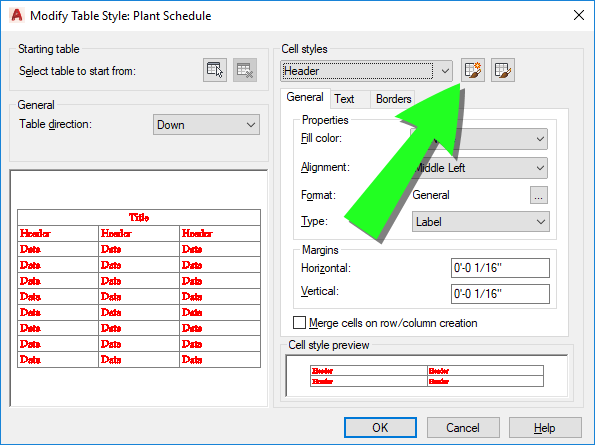
This will bring you to the Modify Table Style window, where you can configure the layout options for the table. Refer to the AutoCAD documentation for more information.
Plant Group Cell Style
A Table Style is a collection of Cell Styles that are applied to different kinds of rows or cells. Each Table Style has three built-in cell styles: Title (used for the title row), Header (used for the column headings) and Data (used for everything else).
If you plan to group the plants on your plant schedule (for example, grouping plants by annuals, perennials, trees, etc.), Plant Scheduler will write a heading row for each group, and you will need to decide how to format these headings. You can use one of the three built-in styles, but it may also be appropriate to create a new style to use for this row. For example, you may want your group heading row to use underlined text.
To create a new Cell Style for your group headings, click the New Cell Style button in the Modify Table Style window (see green arrow above). In the Create New Cell Style window, choose to start with whichever existing style is closest to the formatting you want for group headings, and give it a new name. "Plant Group" might be nice. Then configure the new style as appropriate.
You don't need to anything with your new cell style in AutoCAD. During the plant schedule creation process you'll tell Plant Scheduler which style to use, and it will apply it to the group heading rows.